A Deep Dive into Node.js: From JavaScript Runtime to Building Scalable Backend Applications

Introduction
JavaScript has come a long way from being a language used primarily to add interactivity to web pages. Today, it powers frontend applications, backend services, command-line tools, automation systems, and even desktop applications.
A significant part of that evolution can be attributed to Node.js.
Node.js made it possible for developers to execute JavaScript outside the browser, opening up opportunities to build server-side applications using a language they may already know.
But Node.js is more than a tool for running JavaScript on a server. Behind it is an architecture involving the V8 JavaScript engine, an event loop, asynchronous I/O, and several runtime components that work together to handle concurrent operations efficiently.
Whether you are a frontend developer exploring backend development or a beginner trying to understand how modern server-side applications work, understanding Node.js provides a solid foundation.
In this guide, we will explore Node.js from the ground up, examine its internal architecture, understand how it handles asynchronous operations, and build a practical REST API.
By the end, you should have a clearer understanding of what happens behind the scenes when a Node.js application runs and how to apply that knowledge when building real-world applications.
Table of Contents
- What Is Node.js?
- The History and Evolution of Node.js
- Why Was Node.js Created?
- How Node.js Works
- Understanding the V8 JavaScript Engine
- Understanding Libuv
- The Node.js Event Loop
- Understanding Asynchronous Programming
- Callbacks, Promises, and Async/Await
- Node.js Core Modules
- Understanding the Node.js Module System
- CommonJS vs ES Modules
- NPM and Package Management
- Working with the File System
- Understanding Buffers and Streams
- Understanding Events and Event Emitters
- Node.js and Databases
- Understanding Process and Environment Variables
- Building an HTTP Server with Node.js
- Understanding APIs and RESTful Services
- Environment Variables and Application Configuration
- Error Handling in Node.js
- Testing Node.js Applications
- Security Considerations in Node.js
- Performance and Scalability
- Node.js Frameworks and Ecosystem
- Common Use Cases of Node.js
- Advantages and Limitations of Node.js
- Node.js Development Best Practices
- Practical Project: Building a Simple REST API
- Common Node.js Mistakes
- Frequently Asked Questions
- Conclusion
- Further Learning Resources
1. What Is Node.js?
Node.js is an open-source, cross-platform JavaScript runtime environment that allows developers to execute JavaScript outside a web browser.
Traditionally, JavaScript was associated with frontend development. It was used to make web pages interactive, validate forms, respond to user actions, and manipulate the Document Object Model (DOM).
However, developers eventually wanted to use JavaScript for more than browser-based functionality.
Node.js made that possible.
With Node.js, developers can use JavaScript to build:
- Backend applications.
- REST APIs.
- Real-time applications.
- Command-line tools.
- Automation scripts.
- Microservices.
- Network applications.
- Development tools.
One important distinction is that Node.js is not a programming language or a JavaScript framework. It is a runtime environment.
JavaScript is the language, while Node.js provides the environment and APIs required to execute JavaScript outside the browser.
For example, consider the following JavaScript code:
console.log("Hello, Node.js!");
In a browser, this code can execute through the browser's JavaScript engine.
With Node.js installed, you can execute the same code directly from your terminal:
node app.js
Node.js makes this possible by providing a runtime environment built around Google's V8 JavaScript engine, alongside additional components that support networking, file-system operations, asynchronous processing, and other system-level functionality.
1.1 Is Node.js a Backend Technology?
Yes, Node.js is widely used for backend development.
However, it is important to understand that Node.js itself does not automatically provide a complete backend architecture.
It provides the runtime and built-in capabilities needed to create server-side applications.
Developers commonly combine Node.js with frameworks such as:
- Express.js
- Fastify
- NestJS
- Koa
These frameworks provide additional abstractions that simplify routing, middleware, request handling, and application organization.
For example, a React Native application can communicate with a Node.js backend through REST APIs.
The mobile application handles the user interface, while the backend handles business logic, authentication, database operations, and other server-side responsibilities.
This separation allows frontend and backend applications to evolve independently.
2. The History and Evolution of Node.js
Node.js was initially created by Ryan Dahl in 2009.
At the time, most traditional web servers followed a thread-based approach to handling incoming connections.
This approach could become resource-intensive when applications needed to maintain many simultaneous connections.
Ryan Dahl wanted to explore a different approach, one that could handle concurrent connections efficiently without creating a separate thread for every request.
His solution was to build a JavaScript runtime around an event-driven, non-blocking I/O architecture.
Node.js was initially built using Google's V8 JavaScript engine and Libuv.
Over the years, the platform evolved significantly.
Some important milestones include:
- 2009: Node.js was introduced.
- 2010: npm was introduced, making package management easier.
- 2011: Node.js gained wider adoption among developers.
- 2015: The Node.js Foundation was established, and Node.js and io.js were brought back together.
- 2019: The OpenJS Foundation became the umbrella organization for several JavaScript projects, including Node.js.
- Today: Node.js continues to evolve with improvements to performance, security, developer tooling, and runtime capabilities.
Node.js has grown into one of the most widely used JavaScript runtime environments.
Its ecosystem now supports everything from small command-line scripts to large-scale production backend systems.
3. Why Was Node.js Created?
To understand why Node.js became popular, it helps to understand some of the problems associated with traditional server architectures.
In a traditional blocking approach, a server might handle an operation and wait for it to finish before continuing with subsequent work.
Imagine a server receiving several requests:
- A user requests information from a database.
- Another user requests an image.
- A third user requests an API response.
If the server blocks while waiting for each operation, resources may be used inefficiently.
Node.js approaches this differently.
It uses non-blocking I/O, allowing certain operations to be initiated without forcing JavaScript execution to wait for their completion.
While one operation is waiting for a file, database, or network response, the runtime can continue processing other eligible work.
This makes Node.js particularly useful for applications that handle many I/O operations.
3.1 The Problem with Blocking I/O
Consider this example:
const fs = require("node:fs");

const data = fs.readFileSync("example.txt", "utf8");

console.log(data);

console.log("This executes after the file has been read.");
The readFileSync() method reads the file synchronously.
JavaScript execution waits until the file-reading operation finishes.
For small scripts, this might not be a problem.
However, performing blocking operations inside a server request handler can negatively affect application responsiveness.
3.2 Non-Blocking I/O
Node.js also provides asynchronous file-system methods.
const fs = require("node:fs");

fs.readFile("example.txt", "utf8", (error, data) => {
  if (error) {
    console.error(error);
    return;
  }

  console.log(data);
});

console.log("This executes without waiting for the file read.");
Here, the application initiates the file-reading operation and continues executing other JavaScript code.
When the operation completes, its callback becomes eligible for execution.
This is one of the fundamental ideas behind Node.js.
4. How Node.js Works
Understanding how Node.js works internally will help you write better applications and troubleshoot unexpected behavior.
At a high level, Node.js combines several components:
- V8 JavaScript engine.
- Libuv.
- Event loop.
- Node.js core APIs.
- Operating-system facilities.
Each component has a specific responsibility.
Simplified Node.js Architecture
             JAVASCRIPT APPLICATION
                       |
                       v
                NODE.JS RUNTIME
                       |
          +------------+------------+
          |                         |
          v                         v
     V8 ENGINE                   NODE.JS APIS
          |                         |
          |                         v
          |                       LIBUV
          |                         |
          |               +---------+---------+
          |               |                   |
          |               v                   v
          |          EVENT LOOP          THREAD POOL
          |               |                   |
          +---------------+-------------------+
                          |
                          v
                  OPERATING SYSTEM
This is a simplified conceptual diagram. Actual execution involves additional internal components and operating-system mechanisms.
4.1 What Happens When a Node.js Application Runs?
When you execute:
node app.js
Several things happen.
Step 1: Node.js starts the runtime.
The Node.js executable initializes the runtime environment.
Step 2: V8 executes JavaScript.
V8 parses and executes the JavaScript code.
Step 3: Node.js exposes runtime APIs.
Your application can access APIs for file operations, networking, processes, streams, and other functionality.
Step 4: Asynchronous operations are initiated.
When your code starts an asynchronous operation, the runtime or operating system handles the operation using the appropriate mechanism.
Step 5: The event loop coordinates execution.
When asynchronous operations complete, their associated callbacks or Promise reactions become eligible to execute.
Step 6: The application continues running.
The process remains active while it has work to perform, such as an active server or pending asynchronous operations.
This combination of components allows Node.js to handle many concurrent I/O operations efficiently.
5. Understanding the V8 JavaScript Engine
V8 is Google's open-source JavaScript and WebAssembly engine.
It is written primarily in C++ and is responsible for compiling and executing JavaScript.
V8 was originally developed for Google Chrome but is also used by Node.js.
When you write JavaScript, the code needs to be processed before the computer can execute it.
V8 handles this process.
Its responsibilities include:
- Parsing JavaScript.
- Creating internal representations of code.
- Compiling JavaScript.
- Executing instructions.
- Optimizing frequently executed code.
- Managing memory.
- Performing garbage collection.
5.1 How V8 Executes JavaScript
Consider:
function calculateTotal(price, quantity) {
  return price * quantity;
}

console.log(calculateTotal(100, 5));
Before execution, V8 processes the JavaScript source code.
A simplified explanation of the process is:
- V8 parses the source code.
- It generates an internal representation.
- Ignition, V8's interpreter, executes bytecode.
- Frequently executed code may be optimized by the TurboFan compiler.
- The runtime manages memory and garbage collection.
Modern V8 uses multiple compilation and optimization strategies, so JavaScript execution is more sophisticated than simply converting every line directly into machine code.
5.2 Why V8 Matters to Node.js
V8 provides the JavaScript execution engine that makes Node.js possible.
However, V8 alone does not provide all the capabilities required for backend development.
It does not independently provide Node.js-specific functionality such as the fs module, the http module, or the Node.js process API.
Node.js adds these capabilities around the JavaScript engine.
This distinction is important:
- V8 executes JavaScript.
- Node.js provides the runtime environment and additional APIs.
- Libuv supports asynchronous I/O and event-loop functionality.
6. Understanding Libuv
Libuv is a multi-platform C library that provides support for asynchronous I/O and other runtime functionality.
It is an important part of Node.js architecture.
Libuv helps Node.js handle operations such as:
- File-system access.
- Network operations.
- DNS-related operations.
- Timers.
- Asynchronous process management.
- Thread-pool operations.
One of its major responsibilities is implementing the event loop.
6.1 What Is the Libuv Thread Pool?
Libuv provides a worker thread pool for operations that require work outside the main JavaScript execution thread.
For example, certain file-system operations and some DNS operations use this thread pool.
The default thread-pool size is four threads, although it can be configured using the UV_THREADPOOL_SIZE environment variable, subject to runtime limitations.
An important clarification: not every asynchronous Node.js operation uses the thread pool.
Network I/O, for example, generally relies on operating-system mechanisms rather than being sent to the Libuv worker pool.
Understanding this difference helps explain how Node.js handles different types of workloads.
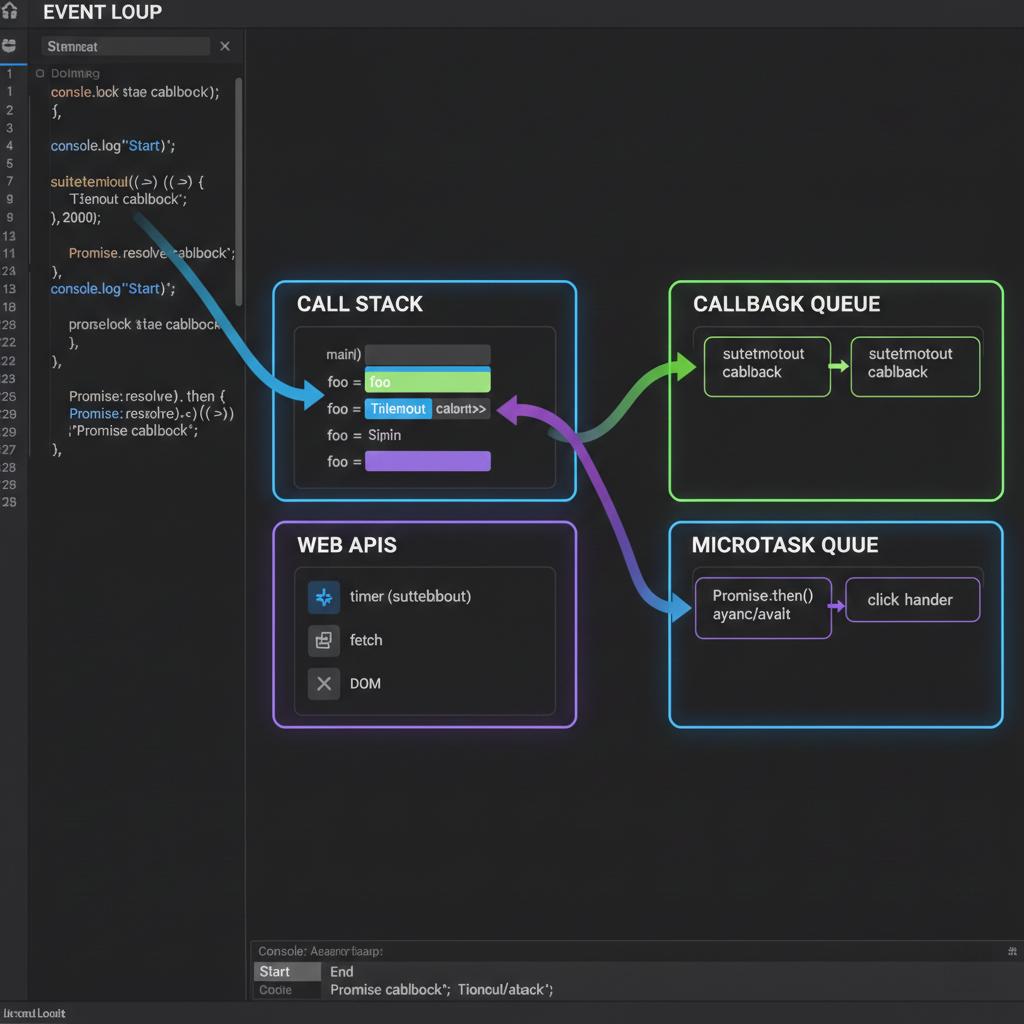
7. The Node.js Event Loop
The event loop is one of the most important concepts in Node.js.
It is responsible for coordinating asynchronous operations and executing callbacks when they are ready.
Without understanding the event loop, it becomes difficult to understand why certain JavaScript operations execute before others.
7.1 What Is the Event Loop?
The event loop allows Node.js to perform non-blocking I/O operations while continuing to execute JavaScript.
Consider:
console.log("First");

setTimeout(() => {
  console.log("Second");
}, 1000);

console.log("Third");
The output is:
First
Third
Second
Why?
Because setTimeout() schedules a callback to run after a specified delay.
JavaScript does not stop and wait for the timer.
Instead, it continues executing the remaining synchronous code.
Once the timer expires and its callback becomes eligible, the event loop coordinates its execution.
7.2 Event Loop Phases
Node.js processes callbacks through several event-loop phases.
The major phases include:
| Phase | Responsibility |
|---|---|
| Timers | Executes eligible timer callbacks |
| Pending callbacks | Executes certain system-related callbacks |
| Idle and prepare | Internal Libuv operations |
| Poll | Retrieves and processes I/O events |
| Check | Executes setImmediate() callbacks |
| Close callbacks | Executes certain close-event callbacks |
There are also important details involving the microtask queues.
Promise reactions and queueMicrotask() callbacks are processed according to JavaScript microtask semantics.
Node.js also has a process.nextTick() queue, which receives special treatment and is processed before the event loop continues to its next phase.
7.3 Understanding setTimeout() and setImmediate()
Both methods schedule callbacks, but they serve different purposes.
setTimeout(() => {
  console.log("Timeout callback");
}, 0);

setImmediate(() => {
  console.log("Immediate callback");
});
The execution order is not guaranteed in every context.
However, when these are scheduled from within an I/O callback, setImmediate() callbacks execute in the check phase after the poll phase, while timers are processed in the timers phase.
The exact timing behavior depends on the surrounding execution context and Node.js version.
7.4 Why the Event Loop Matters
Understanding the event loop helps developers:
- Avoid blocking operations.
- Understand asynchronous execution.
- Improve application responsiveness.
- Diagnose performance issues.
- Handle concurrent requests more effectively.
A common mistake among beginners is assuming that asynchronous operations execute in the exact order they were written.
That is not always the case.
8. Understanding Asynchronous Programming
Asynchronous programming is a fundamental part of Node.js development.
It allows an application to initiate an operation and continue executing other work while waiting for the result.
This is especially useful when working with:
- Databases.
- APIs.
- File systems.
- Network requests.
- Timers.
- External services.
8.1 Synchronous Programming
In synchronous programming, operations execute in sequence.
console.log("Starting");

const result = 10 + 20;

console.log(result);

console.log("Finished");
Output:
Starting
30
Finished
Each statement executes before the next one.
8.2 Asynchronous Programming
Asynchronous operations allow certain tasks to complete independently of the current JavaScript execution flow.
console.log("Starting");

setTimeout(() => {
  console.log("Operation completed");
}, 2000);

console.log("Finished");
Output:
Starting
Finished
Operation completed
The timer does not block the execution of the remaining JavaScript code.
9. Callbacks, Promises, and Async/Await
Node.js supports different approaches to asynchronous programming.
The three commonly discussed approaches are callbacks, Promises, and async/await.
9.1 Callbacks
A callback is a function passed to another function to be executed later.
Example:
function greetUser(name, callback) {
  console.log(`Hello, ${name}`);

  callback();
}

greetUser("Alex", () => {
  console.log("Welcome to the application");
});
Callbacks are commonly used in asynchronous APIs.
For example:
const fs = require("node:fs");

fs.readFile("example.txt", "utf8", (error, data) => {
  if (error) {
    console.error(error);
    return;
  }

  console.log(data);
});
Callback Hell
When multiple asynchronous operations depend on one another, callbacks can become deeply nested.
This is often referred to as callback hell.
It makes code difficult to read, maintain, and debug.
Promises and async/await provide alternative ways to structure asynchronous operations.
9.2 Promises
A Promise represents the eventual completion or failure of an asynchronous operation.
A Promise can be in one of three states:
- Pending.
- Fulfilled.
- Rejected.
Example:
const getUser = new Promise((resolve, reject) => {
  const userExists = true;

  if (userExists) {
    resolve({
      id: 1,
      name: "Alex"
    });
  } else {
    reject(new Error("User not found"));
  }
});

getUser
  .then((user) => {
    console.log(user);
  })
  .catch((error) => {
    console.error(error.message);
  });
The then() method handles successful completion, while catch() handles rejection.
9.3 Async/Await
Async/await provides a cleaner way to work with Promises.
Example:
async function getUser() {
  return {
    id: 1,
    name: "Alex"
  };
}

async function displayUser() {
  try {
    const user = await getUser();

    console.log(user);
  } catch (error) {
    console.error(error);
  }
}

displayUser();
The await keyword pauses execution of the surrounding async function until the Promise settles.
It does not block the entire JavaScript runtime.
When Should You Use Each?
| Approach | Common Use |
|---|---|
| Callbacks | Existing callback-based APIs and event handlers |
| Promises | Managing asynchronous operations and chaining |
| Async/Await | Writing readable asynchronous application logic |
In modern Node.js applications, async/await is commonly used for asynchronous business logic.
However, understanding callbacks and Promises remains essential.
10. Node.js Core Modules
Node.js provides several built-in modules that developers can use without installing additional packages.
These are known as core modules.
They provide functionality for working with files, HTTP requests, operating-system resources, paths, events, and more.
Some commonly used core modules include:
| Module | Purpose |
|---|---|
fs |
File-system operations |
http |
Creating HTTP servers and clients |
https |
HTTPS communication |
path |
Working with file and directory paths |
os |
Operating-system information |
events |
Event-driven programming |
crypto |
Cryptographic functionality |
stream |
Stream processing |
buffer |
Handling binary data |
url |
URL parsing and manipulation |
util |
Utility functions |
child_process |
Creating child processes |
worker_threads |
Running JavaScript in additional threads |
These modules form part of the foundation of Node.js development.
10.1 Importing Core Modules
With CommonJS:
const fs = require("node:fs");
const path = require("node:path");
const http = require("node:http");
The node: prefix explicitly identifies built-in Node.js modules.
10.2 Why Core Modules Matter
Understanding core modules reduces unnecessary dependencies.
For example, you do not need to install an external package just to read a file or create a basic HTTP server.
Learning these modules also helps developers understand what frameworks and third-party packages are doing behind the scenes.
11. Understanding the Node.js Module System
As applications grow, placing all application logic inside one JavaScript file becomes difficult to maintain.
Modules solve this problem by allowing developers to organize code into reusable files.
For example:
my-project/
│
├── app.js
├── user.js
└── package.json
The user.js file can contain functionality that another file imports and uses.
11.1 Exporting a Module
function getUser() {
  return {
    id: 1,
    name: "Alex"
  };
}

module.exports = getUser;
11.2 Importing a Module
const getUser = require("./user");

console.log(getUser());
This allows functionality to be shared across different parts of an application.
Modules encourage:
- Code reusability.
- Separation of responsibilities.
- Easier testing.
- Better organization.
- Maintainability.
12. CommonJS vs ES Modules
Node.js supports two major JavaScript module systems:
- CommonJS.
- ECMAScript Modules (ES Modules).
Understanding their differences is important because many existing Node.js projects use CommonJS, while modern JavaScript projects frequently use ES Modules.
12.1 CommonJS
CommonJS uses require() to import modules and module.exports to export functionality.
Example:
const fs = require("node:fs");

function greet() {
  console.log("Hello from CommonJS");
}

module.exports = greet;
12.2 ES Modules
ES Modules use import and export.
Example:
import fs from "node:fs";

function greet() {
  console.log("Hello from ES Modules");
}

export default greet;
To configure a Node.js project to use ES Modules, you can add:
{
  "type": "module"
}
to package.json.
Alternatively, use the .mjs file extension.
12.3 Comparison
| Feature | CommonJS | ES Modules |
|---|---|---|
| Import | require() |
import |
| Export | module.exports |
export |
| Loading | Traditionally synchronous | Static module structure |
| File extension | .js or .cjs |
.js with module configuration or .mjs |
| Dynamic loading | require() |
import() |
Both module systems are supported by Node.js.
Choose one based on your project's ecosystem and configuration, and avoid mixing them without understanding the interoperability rules.
13. NPM and Package Management
NPM stands for Node Package Manager.
It is the default package manager distributed with Node.js.
NPM allows developers to install, manage, update, and share packages.
A package is reusable code that can be integrated into an application.
For example, Express is an npm package used to build web applications and APIs.
13.1 Initializing a Project
To create a new Node.js project:
npm init -y
This generates a package.json file.
The file contains project metadata, scripts, dependencies, and configuration.
Example:
{
  "name": "my-node-app",
  "version": "1.0.0",
  "description": "A simple Node.js application",
  "main": "index.js",
  "scripts": {
    "start": "node index.js"
  }
}
13.2 Installing Packages
To install Express:
npm install express
To install a development dependency:
npm install --save-dev nodemon
Development dependencies are typically used during development, testing, and building rather than being required by the production application at runtime.
13.3 Common NPM Commands
| Command | Purpose |
|---|---|
npm init -y |
Initializes a project |
npm install |
Installs project dependencies |
npm install express |
Installs Express |
npm install -D jest |
Installs Jest as a development dependency |
npm uninstall express |
Removes a package |
npm update |
Updates dependencies within allowed version ranges |
npm list |
Lists installed packages |
npm run start |
Runs a custom script |
npm audit |
Checks dependencies for known security vulnerabilities |
13.4 Understanding package-lock.json
When you install dependencies, npm generates a package-lock.json file.
This file records the resolved dependency tree and package versions.
It helps ensure consistent dependency installation across development and deployment environments.
For most npm-managed applications, commit the lockfile to version control.
14. Working with the File System
Node.js provides the fs module for interacting with the file system.
It allows developers to:
- Read files.
- Create files.
- Update files.
- Delete files.
- Create directories.
- Rename files.
- Inspect file information.
14.1 Reading a File
const fs = require("node:fs");

fs.readFile("example.txt", "utf8", (error, data) => {
  if (error) {
    console.error(error);
    return;
  }

  console.log(data);
});
14.2 Writing to a File
const fs = require("node:fs");

fs.writeFile("example.txt", "Hello from Node.js!", (error) => {
  if (error) {
    console.error(error);
    return;
  }

  console.log("File created successfully");
});
14.3 Creating a Directory
const fs = require("node:fs");

fs.mkdir("uploads", { recursive: true }, (error) => {
  if (error) {
    console.error(error);
    return;
  }

  console.log("Directory created");
});
14.4 Deleting a File
const fs = require("node:fs");

fs.unlink("example.txt", (error) => {
  if (error) {
    console.error(error);
    return;
  }

  console.log("File deleted");
});
The fs module is useful for applications that need to manage files, process uploads, generate reports, or interact with local storage.
For most server-side application code, asynchronous file-system methods are preferable to synchronous methods.
15. Understanding Buffers and Streams
Buffers and streams are important concepts in Node.js, particularly when working with binary data and large files.
15.1 What Is a Buffer?
A Buffer is a class used to handle raw binary data.
JavaScript traditionally works with strings and other high-level data structures.
However, applications often need to work with binary information such as:
- Images.
- Videos.
- Audio.
- Network packets.
- Uploaded files.
Node.js provides Buffer for these situations.
Example:
const buffer = Buffer.from("Hello Node.js");

console.log(buffer);

console.log(buffer.toString());
The Buffer stores the underlying data as bytes.
15.2 What Are Streams?
Streams allow data to be processed in smaller chunks rather than loading an entire resource into memory.
This is especially useful when handling large files or continuous data.
Node.js provides four main stream types:
| Stream Type | Description |
|---|---|
| Readable | Provides data that can be read |
| Writable | Accepts data that can be written |
| Duplex | Supports reading and writing |
| Transform | Processes data while reading and writing |
15.3 Reading a File Using Streams
const fs = require("node:fs");

const readableStream = fs.createReadStream("large-file.txt");

readableStream.on("data", (chunk) => {
  console.log("Received a chunk:", chunk);
});

readableStream.on("end", () => {
  console.log("File reading completed");
});

readableStream.on("error", (error) => {
  console.error(error);
});
Instead of loading the entire file into memory, the application receives data in chunks.
This makes streams particularly useful for handling large resources efficiently.
15.4 Piping Streams
Streams can be connected using the pipe() method.
Example:
const fs = require("node:fs");

const readable = fs.createReadStream("source.txt");

const writable = fs.createWriteStream("destination.txt");

readable.pipe(writable);
This reads data from one file and writes it into another.
For more complex stream processing, developers can also use stream.pipeline(), which provides better error propagation and stream cleanup.
16. Understanding Events and Event Emitters
Node.js uses an event-driven architecture.
An event is an action or occurrence that an application can respond to.
Examples include:
- A user connecting to a server.
- A file finishing its upload.
- A request arriving.
- A stream receiving data.
- A process receiving a signal.
Node.js provides the events module, which contains the EventEmitter class.
16.1 Creating an Event Emitter
const EventEmitter = require("node:events");

const eventEmitter = new EventEmitter();

eventEmitter.on("userRegistered", () => {
  console.log("A new user has registered");
});

eventEmitter.emit("userRegistered");
Output:
A new user has registered
Here:
on()registers an event listener.emit()triggers the event.
16.2 Passing Data Through Events
const EventEmitter = require("node:events");

const eventEmitter = new EventEmitter();

eventEmitter.on("userRegistered", (user) => {
  console.log(`Welcome, ${user.name}`);
});

eventEmitter.emit("userRegistered", {
  id: 1,
  name: "Alex"
});
Output:
Welcome, Alex
Event emitters are useful for building decoupled application components.
However, they are not a replacement for distributed messaging systems when communication needs to happen across multiple processes or servers.
17. Node.js and Databases
Most backend applications need a way to store and retrieve data.
Node.js can communicate with different database systems using drivers, clients, and ORM libraries.
Some popular database choices include:
- PostgreSQL.
- MySQL.
- MongoDB.
- SQLite.
- Microsoft SQL Server.
17.1 Relational Databases
Relational databases organize data into tables with defined relationships.
For example, a user table might contain:
| id | name | |
|---|---|---|
| 1 | Alex | alex@example.com |
| 2 | Jordan | jordan@example.com |
PostgreSQL and MySQL are common relational database choices.
17.2 NoSQL Databases
NoSQL databases use different data models, including document-based, key-value, graph, and wide-column structures.
MongoDB, for example, stores data in flexible documents.
Example:
{
  "_id": "123",
  "name": "Alex",
  "email": "alex@example.com",
  "role": "developer"
}
17.3 Connecting Node.js to a Database
Node.js applications can connect to databases using database-specific drivers.
For example, PostgreSQL can be accessed using the pg package.
Install:
npm install pg
Example:
const { Pool } = require("pg");

const pool = new Pool({
  connectionString: process.env.DATABASE_URL
});

async function getUsers() {
  const result = await pool.query(
    "SELECT * FROM users"
  );

  return result.rows;
}
For production applications, configure connection pooling, secure credentials, appropriate timeouts, and error handling.
17.4 What Is an ORM?
ORM stands for Object-Relational Mapping.
An ORM provides an abstraction for interacting with relational databases using application-language objects and models.
Popular options in the Node.js ecosystem include:
- Prisma.
- Sequelize.
- TypeORM.
For MongoDB, developers commonly use Mongoose.
An ORM can simplify database operations, but developers should still understand SQL, database relationships, indexing, and query performance.
18. Understanding Process and Environment Variables
Node.js provides a global process object that exposes information about the currently running application.
It allows developers to interact with the runtime environment.
For example:
console.log(process.version);

console.log(process.platform);

console.log(process.pid);
These properties provide information about:
- Node.js version.
- Operating-system platform.
- Process identifier.
18.1 Environment Variables
Environment variables allow applications to receive configuration values from their execution environment.
For example:
const port = process.env.PORT || 3000;

console.log(`Application running on port ${port}`);
This is particularly useful when deploying applications across development, testing, staging, and production environments.
18.2 Exiting a Process
Node.js provides process.exit() to terminate the current process.
Example:
process.exit(0);
The value 0 conventionally indicates successful termination, while nonzero exit codes generally indicate failure.
Use process termination carefully because immediate termination can interrupt pending asynchronous operations.
19. Building an HTTP Server with Node.js
One of the most practical ways to understand Node.js is to build a server.
An HTTP server receives requests from clients and sends responses back.
A client might be:
- A web browser.
- A React application.
- A React Native mobile application.
- Another backend service.
- A command-line HTTP client.
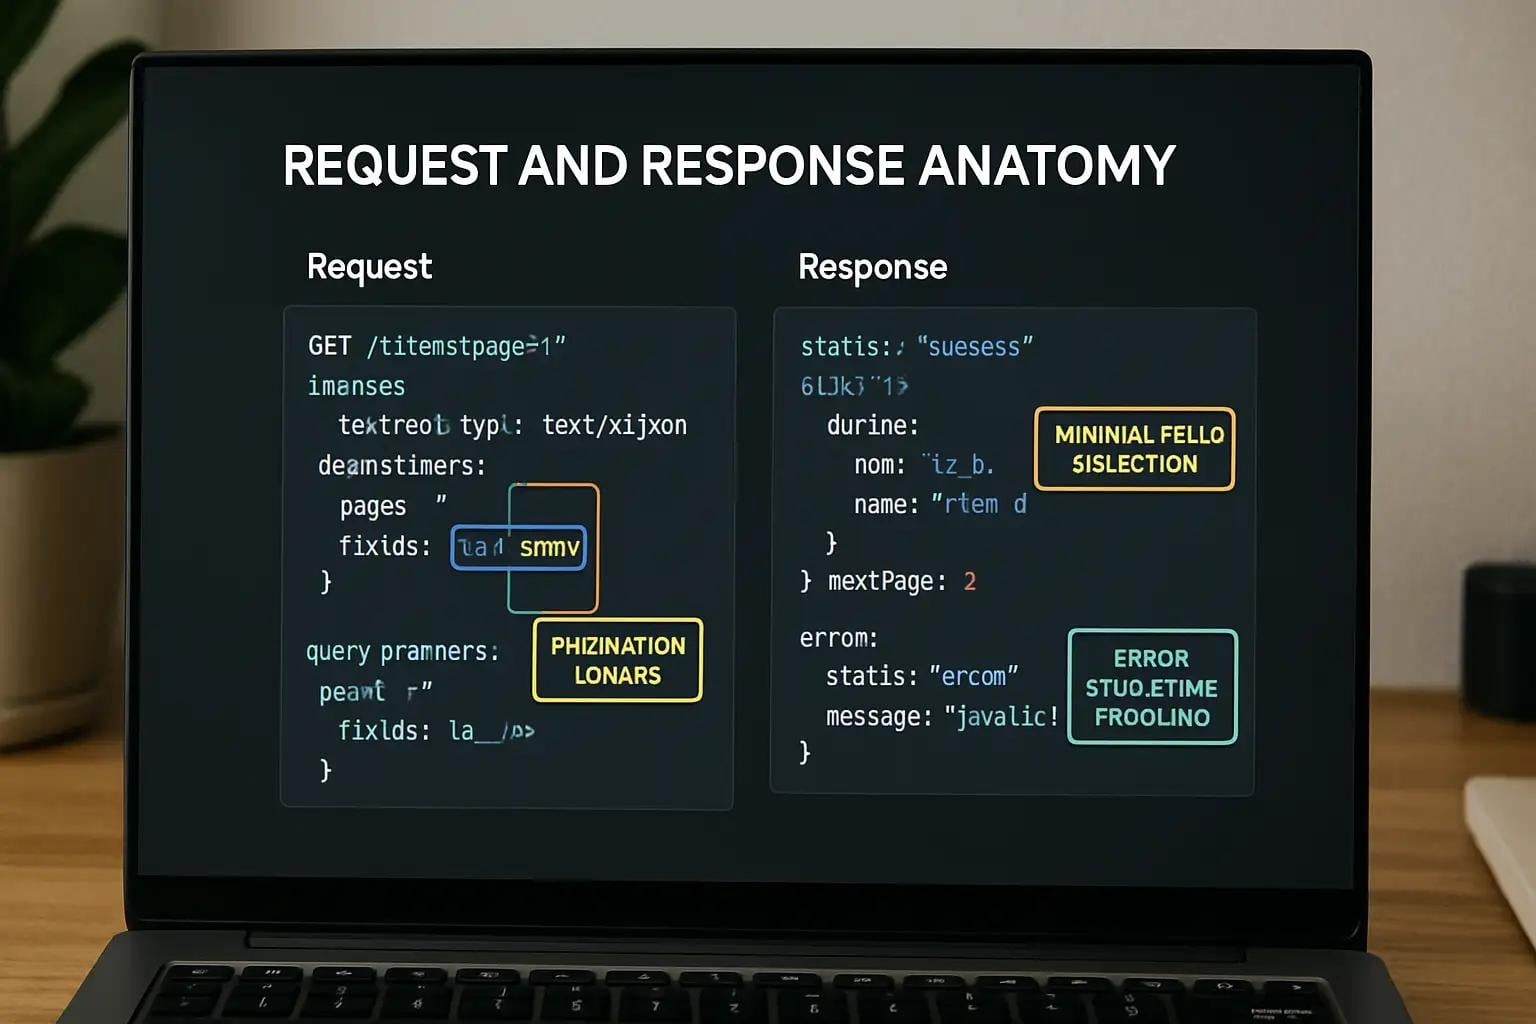
When a client communicates with a server, HTTP defines how requests and responses are structured.
Node.js provides the built-in http module for creating HTTP servers.
19.1 Creating Your First HTTP Server
Create a file named server.js.
const http = require("node:http");

const server = http.createServer((request, response) => {
  response.writeHead(200, {
    "Content-Type": "text/plain"
  });

  response.end("Hello, welcome to my server!");
});

server.listen(3000, () => {
  console.log("Server is running at http://localhost:3000");
});
Run the application:
node server.js
Open your browser and navigate to:
http://localhost:3000
You should see:
Hello, welcome to my server!
You have created a basic HTTP server using Node.js without installing an external framework.
19.2 Understanding the Code
Importing the HTTP module
const http = require("node:http");
This imports the built-in HTTP module.
Creating the server
const server = http.createServer((request, response) => {
  // Handle request
});
The createServer() method creates an HTTP server.
It accepts a callback that executes whenever the server receives a request.
The callback receives two important objects:
request: Contains information about the incoming request.response: Provides methods for sending a response to the client.
Sending the response
response.writeHead(200, {
  "Content-Type": "text/plain"
});

response.end("Hello, welcome to my server!");
The writeHead() method sets the HTTP status code and response headers.
The end() method sends the response and indicates that the response is complete.
Starting the server
server.listen(3000, () => {
  console.log("Server is running");
});
The server begins listening for incoming connections on port 3000.
19.3 Understanding HTTP Status Codes
HTTP status codes communicate the outcome of a request.
| Category | Range | Meaning |
|---|---|---|
| Informational | 100–199 | Request processing information |
| Successful | 200–299 | Request completed successfully |
| Redirection | 300–399 | Additional action or redirection required |
| Client errors | 400–499 | Problem with the request |
| Server errors | 500–599 | Server failed to fulfill a valid request |
Some commonly used status codes include:
| Status Code | Meaning |
|---|---|
200 OK |
Request completed successfully |
201 Created |
A resource was created |
204 No Content |
Request succeeded without a response body |
400 Bad Request |
Request contains invalid input |
401 Unauthorized |
Authentication is required or invalid |
403 Forbidden |
Access is not permitted |
404 Not Found |
Requested resource does not exist |
409 Conflict |
Request conflicts with the current resource state |
422 Unprocessable Content |
Request content cannot be processed |
500 Internal Server Error |
Unexpected server error |
Choosing appropriate status codes makes APIs easier for clients to understand and integrate with.
19.4 Handling Different Routes
A basic HTTP server can respond differently depending on the requested URL.
const http = require("node:http");

const server = http.createServer((request, response) => {
  if (request.url === "/") {
    response.writeHead(200, {
      "Content-Type": "text/plain"
    });

    response.end("Welcome to the homepage");
    return;
  }

  if (request.url === "/about") {
    response.writeHead(200, {
      "Content-Type": "text/plain"
    });

    response.end("This is the about page");
    return;
  }

  response.writeHead(404, {
    "Content-Type": "text/plain"
  });

  response.end("Page not found");
});

server.listen(3000);
This works, but as an application grows, manually checking every route becomes difficult.
That is one reason backend developers often use frameworks such as Express and Fastify.
20. Understanding APIs and RESTful Services
An API, or Application Programming Interface, provides a defined way for different software systems to communicate.
In backend development, APIs allow frontend applications to interact with server-side functionality.
For example, consider a mobile banking application.
The mobile application may allow a user to:
- Create an account.
- Log in.
- View account information.
- Check transaction history.
- Transfer money.
- Update personal details.
The mobile application does not need direct access to the database.
Instead, it communicates with a backend API.
The backend receives requests, validates them, performs the required operations, and returns responses.
20.1 How a Client Communicates with a Node.js API
A simplified request flow looks like this:
         MOBILE APPLICATION
                 |
                 |
             HTTP Request
                 |
                 v
           NODE.JS SERVER
                 |
                 |
          REQUEST HANDLING
                 |
                 v
          APPLICATION LOGIC
                 |
                 |
              DATABASE
                 |
                 v
           SERVER RESPONSE
                 |
                 |
                 v
         MOBILE APPLICATION
For example, when a user opens their profile, the mobile application may send:
GET /api/users/123
The server processes the request and returns:
{
  "id": 123,
  "name": "Alex",
  "email": "alex@example.com"
}
This is a simplified example of client-server communication.
20.2 What Is REST?
REST stands for Representational State Transfer.
It is an architectural style for designing networked applications.
RESTful APIs commonly use HTTP methods to represent operations on resources.
| Method | Common Purpose |
|---|---|
| GET | Retrieve a resource |
| POST | Create a resource or trigger an operation |
| PUT | Replace a resource |
| PATCH | Partially update a resource |
| DELETE | Remove a resource |
For example, an API for managing users might provide:
GET     /api/users
GET     /api/users/:id
POST    /api/users
PUT     /api/users/:id
PATCH   /api/users/:id
DELETE  /api/users/:id
The exact behavior of each endpoint should be documented clearly.
20.3 Understanding Middleware
Middleware is a function or processing component that runs during the request-response cycle.
Middleware can perform tasks such as:
- Logging requests.
- Checking authentication.
- Validating input.
- Parsing request bodies.
- Handling errors.
- Applying security policies.
In Express, middleware receives the request, response, and a next function.
Example:
function requestLogger(req, res, next) {
  console.log(`${req.method} ${req.url}`);

  next();
}
The next() function passes control to the next middleware or route handler.
Middleware is an important part of building organized backend applications.
20.4 Why Developers Use Express
Express is a minimal web framework for Node.js.
It simplifies many tasks involved in HTTP application development.
Install Express:
npm install express
Create server.js:
const express = require("express");

const app = express();

app.use(express.json());

app.get("/", (req, res) => {
  res.send("Welcome to my Express API");
});

app.get("/api/users", (req, res) => {
  res.json([
    {
      id: 1,
      name: "Alex"
    },
    {
      id: 2,
      name: "Jordan"
    }
  ]);
});

app.listen(3000, () => {
  console.log("Server running on port 3000");
});
This application creates two GET endpoints.
The first responds to the homepage, while the second returns a JSON array containing sample user records.
The express.json() middleware parses incoming JSON request bodies.
21. Environment Variables and Application Configuration
Applications often need configuration values that should not be written directly into their source code.
Examples include:
- Database connection strings.
- API keys.
- Authentication secrets.
- Server port numbers.
- External service credentials.
- Application environment settings.
Environment variables provide a way to supply these values to an application at runtime.
21.1 Accessing Environment Variables
Node.js exposes environment variables through process.env.
For example:
const port = process.env.PORT || 3000;

console.log(`Server port: ${port}`);
If the PORT variable exists, the application uses its value.
Otherwise, it defaults to port 3000.
21.2 Using a .env File
During development, developers often use a .env file to store local configuration values.
A typical file might contain:
PORT=3000
NODE_ENV=development
DATABASE_URL=your_database_connection_string
JWT_SECRET=your_development_secret
A package such as dotenv can load these values into process.env.
Install it:
npm install dotenv
Load the configuration:
require("dotenv").config();

const port = process.env.PORT || 3000;
Alternatively, supported modern Node.js releases provide native environment-file loading options, including the --env-file command-line option.
For example:
node --env-file=.env server.js
Check the documentation for the Node.js version used by your project.
21.3 Protecting Sensitive Configuration
A .env file may contain sensitive information.
It should not be committed to a public GitHub repository.
Add it to .gitignore:
node_modules/
.env
.env.*
!.env.example
You can provide a .env.example file containing the names of the required variables without exposing their actual values.
Example:
PORT=
DATABASE_URL=
JWT_SECRET=
This helps other developers understand which configuration values are required.
Important: If a secret has already been committed to Git, deleting the file in a later commit does not remove the secret from Git history. Rotate the exposed credential and follow the appropriate history-cleanup procedure.
22. Error Handling in Node.js
Errors are an unavoidable part of application development.
A database may become unavailable, a file may not exist, an API request may fail, or a user may submit invalid information.
A reliable Node.js application should anticipate these situations and handle them appropriately.
22.1 Synchronous Error Handling
JavaScript provides try...catch for handling exceptions.
Example:
try {
  const result = JSON.parse("{invalid json}");

  console.log(result);
} catch (error) {
  console.error("Unable to parse JSON:", error.message);
}
Instead of terminating the normal execution flow with an uncaught exception, the application handles the error within the catch block.
22.2 Asynchronous Error Handling with Async/Await
When using async/await, try...catch can also handle rejected Promises.
async function getUser() {
  try {
    const response = await fetch(
      "https://example.com/api/users/1"
    );

    if (!response.ok) {
      throw new Error(`HTTP error: ${response.status}`);
    }

    const user = await response.json();

    return user;
  } catch (error) {
    console.error("Unable to retrieve user:", error.message);
    throw error;
  }
}
Notice that the error is rethrown.
This allows the calling function to decide how the failure should be handled.
22.3 Creating Custom Errors
Applications often benefit from custom error classes.
class NotFoundError extends Error {
  constructor(message) {
    super(message);

    this.name = "NotFoundError";
    this.statusCode = 404;
  }
}

function findUser(userId) {
  if (!userId) {
    throw new NotFoundError("User was not found");
  }
}
Custom errors allow applications to distinguish between different failure conditions.
For example:
- Authentication errors.
- Validation errors.
- Resource-not-found errors.
- Database errors.
- Permission errors.
22.4 Centralized Error Handling
In an Express application, error-handling middleware can provide a consistent way to handle errors.
function errorHandler(err, req, res, next) {
  const statusCode = err.statusCode || 500;

  console.error(err);

  res.status(statusCode).json({
    success: false,
    message:
      statusCode === 500
        ? "An unexpected server error occurred"
        : err.message
  });
}
Register it after the application's routes:
app.use(errorHandler);
For asynchronous route handlers, make sure rejected Promises are forwarded to the error-handling middleware. Express 5 automatically forwards rejected Promises returned by route handlers and middleware, while Express 4 applications generally require explicit forwarding or a suitable wrapper.
22.5 Why Error Handling Matters
Good error handling improves:
- Application reliability.
- Debugging.
- User experience.
- API consistency.
- Security.
- Maintainability.
One important rule is to avoid exposing internal stack traces, database details, passwords, or sensitive system information in production API responses.
Detailed errors should be recorded securely in application logs, while clients receive appropriate and understandable messages.
23. Testing Node.js Applications
Writing application code is only part of software development.
Developers also need to verify that their code behaves as expected.
Testing helps identify defects, prevent regressions, and improve confidence when making changes.
Node.js applications can be tested using several approaches.
23.1 Unit Testing
Unit testing focuses on individual functions or small units of application logic.
For example, consider a function that calculates the total price of an order.
function calculateTotal(price, quantity) {
  return price * quantity;
}

module.exports = calculateTotal;
A unit test can verify its behavior.
Node.js includes a built-in test runner through node:test.
Example:
const test = require("node:test");
const assert = require("node:assert");
const calculateTotal = require("./calculateTotal");

test("calculates the total price correctly", () => {
  const result = calculateTotal(100, 3);

  assert.strictEqual(result, 300);
});
Run the test:
node --test
The built-in test runner is useful for projects that do not require an external testing framework.
23.2 Jest
Jest is a JavaScript testing framework commonly used for unit and integration testing.
It provides:
- Test organization.
- Assertions.
- Mocking.
- Setup and teardown hooks.
- Code coverage reporting.
Install it:
npm install --save-dev jest
Add a test script to package.json:
{
  "scripts": {
    "test": "jest"
  }
}
Example test:
const calculateTotal = require("./calculateTotal");

describe("calculateTotal", () => {
  it("returns the correct total", () => {
    expect(calculateTotal(100, 3)).toBe(300);
  });
});
Run:
npm test
23.3 Integration Testing
Integration testing checks whether different parts of an application work correctly together.
For example, an integration test might verify that:
- A client sends a request to an API endpoint.
- The route receives the request.
- Middleware processes the request.
- The controller executes the application logic.
- The service communicates with the database.
- The server returns the expected response.
This is different from unit testing because the test examines interactions between components.
23.4 API Testing with Supertest
Supertest is a library used to test HTTP servers and APIs.
It can send HTTP requests and verify their responses without requiring a separate manual testing process.
Install:
npm install --save-dev supertest
Example:
const request = require("supertest");
const app = require("./app");

describe("GET /api/users", () => {
  it("returns a list of users", async () => {
    const response = await request(app)
      .get("/api/users")
      .expect(200);

    expect(Array.isArray(response.body)).toBe(true);
  });
});
This assumes the application exports its Express instance separately from the code that starts the server.
23.5 Types of Testing
| Testing Type | Purpose |
|---|---|
| Unit testing | Tests individual functions or components |
| Integration testing | Tests interactions between application components |
| API testing | Verifies HTTP endpoints and responses |
| End-to-end testing | Tests complete application workflows |
| Load testing | Examines application behavior under expected or high traffic |
| Security testing | Identifies security weaknesses |
A good testing strategy combines different testing approaches rather than relying on only one.
24. Security Considerations in Node.js
Security should be considered from the beginning of application development.
A backend application often handles personal information, authentication credentials, payment information, and other sensitive data.
If these resources are not protected properly, attackers may exploit vulnerabilities to access information or disrupt application operations.
Node.js applications are not automatically secure simply because they use a particular runtime or framework.
Developers must apply appropriate security practices.
24.1 Input Validation
Never assume that incoming request data is valid.
A client can send incomplete, unexpected, or malicious input.
For example, consider a registration endpoint.
The application should validate:
- Whether an email address is provided.
- Whether the email format is acceptable.
- Whether the password meets the required policy.
- Whether required fields are missing.
- Whether input values fall within acceptable limits.
Example:
function validateRegistration(data) {
  if (!data.email || !data.password) {
    throw new Error("Email and password are required");
  }

  if (!/^[^\s@]+@[^\s@]+\.[^\s@]+$/.test(data.email)) {
    throw new Error("Invalid email address");
  }

  if (data.password.length < 8) {
    throw new Error("Password must contain at least 8 characters");
  }

  return true;
}
For production applications, consider a dedicated validation library and define clear schemas for request bodies, query parameters, and route parameters.
24.2 Password Hashing
Passwords should never be stored as plain text.
Instead, applications should use an appropriate password-hashing algorithm.
Examples include:
- Argon2id.
- bcrypt.
- scrypt.
These algorithms are designed for password storage and are deliberately more expensive to compute than ordinary fast hashes.
A simplified example using bcrypt:
const bcrypt = require("bcrypt");

async function hashPassword(password) {
  const saltRounds = 12;

  return bcrypt.hash(password, saltRounds);
}
To verify a password:
async function verifyPassword(password, hashedPassword) {
  return bcrypt.compare(password, hashedPassword);
}
The application stores the resulting hash, not the original password.
The cost parameters should be selected according to the application's security and performance requirements.
24.3 Authentication and Authorization
These terms are related but have different meanings.
Authentication determines who a user is.
Authorization determines what that user is allowed to do.
For example:
A user logs in with an email address and password. The server verifies the credentials and establishes an authenticated session.
That is authentication.
If the same user attempts to access an administrative endpoint, the application checks whether the user has the required permissions.
That is authorization.
Both are necessary for secure backend development.
24.4 HTTPS
HTTPS protects communication between clients and servers through TLS.
Without appropriate transport encryption, sensitive information may be exposed while traveling across networks.
Production applications should use HTTPS, including when transmitting authentication credentials and personal information.
24.5 Rate Limiting
Rate limiting restricts how frequently clients can make requests.
It can help reduce:
- Brute-force login attempts.
- Automated abuse.
- Excessive API requests.
- Resource exhaustion.
For example, an application might limit the number of login attempts allowed within a specified time window.
The exact limits should depend on the endpoint and application requirements.
24.6 Dependency Security
Node.js applications often depend on third-party packages.
These packages can introduce vulnerabilities if they are outdated or compromised.
Useful practices include:
npm audit
Other recommendations:
- Review package maintainers and release histories.
- Remove unused dependencies.
- Keep dependencies updated.
- Review security advisories.
- Commit and maintain lockfiles.
- Avoid installing packages without understanding their purpose.
24.7 Additional Security Practices
| Practice | Why It Matters |
|---|---|
| Use parameterized database queries | Reduces SQL injection risks |
| Validate incoming data | Prevents unexpected input from reaching application logic |
| Protect environment variables | Prevents credential exposure |
| Apply access controls | Prevents unauthorized resource access |
| Configure secure HTTP headers | Reduces certain browser-related attacks |
| Limit request sizes | Helps prevent resource exhaustion |
| Avoid exposing stack traces | Protects internal application details |
| Use secure session management | Protects authenticated users |
Security is an ongoing responsibility. It should be part of development, testing, deployment, and maintenance.
25. Performance and Scalability
Performance describes how efficiently an application uses resources and responds to requests.
Scalability describes its ability to handle increasing workloads.
Node.js is particularly useful for I/O-intensive applications, but its performance depends heavily on how the application is designed.
25.1 Avoid Blocking the Event Loop
The event loop is responsible for coordinating JavaScript execution and asynchronous callbacks.
Long-running synchronous operations can prevent it from processing other callbacks.
For example:
const fs = require("node:fs");

const data = fs.readFileSync("large-file.txt", "utf8");

console.log(data);
This operation blocks the JavaScript thread until the file has been read.
For server-side applications, prefer asynchronous operations when working with files, databases, and external services.
25.2 Use Streams for Large Data
Loading large files entirely into memory can increase memory consumption.
Streams allow data to be processed incrementally.
For example, instead of reading an entire file into a variable before sending it, an application can stream the file to the client.
This is especially useful for:
- Large downloads.
- File uploads.
- Video processing.
- Data exports.
- Log processing.
25.3 Use Caching
Caching stores frequently accessed data so that applications do not need to repeat expensive operations unnecessarily.
For example, a product catalog that changes infrequently may be cached.
Caching can reduce database queries and improve response times.
Common caching solutions include:
- In-memory caches.
- Redis.
- HTTP caching.
- CDN caching.
However, caching introduces questions about expiration, invalidation, consistency, and stale data. It should be designed around the application's requirements.
25.4 Use Worker Threads for CPU-Intensive Tasks
Node.js is well suited to many I/O-intensive workloads.
However, CPU-intensive operations can occupy the main JavaScript thread and delay other work.
Examples include:
- Large mathematical calculations.
- Complex data processing.
- Image transformations.
- Computational simulations.
Node.js provides the worker_threads module for executing JavaScript in additional threads.
Example:
const {
  Worker,
  isMainThread,
  parentPort
} = require("node:worker_threads");

if (isMainThread) {
  const worker = new Worker(__filename);

  worker.on("message", (result) => {
    console.log("Result:", result);
  });

  worker.on("error", (error) => {
    console.error(error);
  });
} else {
  const result = 100 * 100;

  parentPort.postMessage(result);
}
In this example, the main thread creates a worker that performs a calculation and sends the result back.
For substantial workloads, developers should consider worker lifecycle management, task distribution, and the overhead of communicating between threads.
25.5 Horizontal Scaling
Horizontal scaling means adding more application instances to distribute incoming traffic.
For example:
              INCOMING REQUESTS
                      |
                      v
                 LOAD BALANCER
                      |
          +-----------+-----------+
          |           |           |
          v           v           v
       SERVER 1    SERVER 2    SERVER 3
          |           |           |
          +-----------+-----------+
                      |
                      v
                   DATABASE
A load balancer distributes requests across multiple application instances.
Node.js applications can be deployed in this way.
However, developers must consider shared session storage, centralized caching, database connection limits, and background job coordination.
25.6 The Cluster Module
Node.js also provides the cluster module, which allows applications to create multiple worker processes that can share a server port.
This makes it possible to use multiple CPU cores for handling requests.
Another approach is to run separate application instances using a process manager or container orchestration platform.
The best choice depends on the deployment environment and operational requirements.
26. Node.js Frameworks and Ecosystem
Node.js provides the runtime environment, but developers often use additional frameworks and libraries to simplify application development.
The ecosystem contains tools for building web servers, APIs, authentication systems, real-time applications, and more.
Here are some commonly used frameworks.
26.1 Express.js
Express is a minimal and flexible web framework for Node.js.
It provides functionality for:
- Routing.
- Middleware.
- Request handling.
- Response management.
- Error handling.
Express is a common starting point for developers learning backend development with Node.js.
Official website: Express
26.2 Fastify
Fastify is a web framework designed with performance and developer experience in mind.
It offers:
- Schema-based validation.
- Serialization.
- Plugin architecture.
- Logging integration.
- TypeScript support.
Official website: Fastify
26.3 NestJS
NestJS is a framework for building structured and scalable server-side applications.
It uses architectural concepts such as:
- Modules.
- Controllers.
- Providers.
- Dependency injection.
- Decorators.
NestJS is particularly useful for larger applications where clear architecture and separation of responsibilities are important.
Official website: NestJS
26.4 Koa
Koa is a lightweight web framework created by the team behind Express.
It uses modern JavaScript features and provides a smaller core that developers can extend with middleware.
Official website: Koa
26.5 Framework Comparison
| Framework | Main Focus | Common Use |
|---|---|---|
| Express | Simplicity and flexibility | REST APIs and web servers |
| Fastify | Performance and schema-based development | High-throughput APIs |
| NestJS | Structured application architecture | Enterprise and large backend systems |
| Koa | Minimal middleware-based development | Lightweight web applications |
A framework should be selected based on the application's complexity, team experience, ecosystem requirements, and long-term maintenance needs.
A popular framework is not automatically the best choice for every project.
27. Common Use Cases of Node.js
Node.js is used across different types of applications.
Its event-driven architecture and asynchronous I/O capabilities make it particularly useful for applications that handle frequent network communication and external service interactions.
27.1 REST API Development
Node.js is commonly used to create backend APIs that serve web and mobile applications.
For example, a React Native application can communicate with a Node.js API to:
- Register users.
- Authenticate users.
- Retrieve profiles.
- Submit transactions.
- Update account information.
This allows the frontend and backend to operate as separate components.
27.2 Real-Time Applications
Node.js is frequently used in applications that require ongoing communication between clients and servers.
Examples include:
- Chat applications.
- Collaborative editing tools.
- Live dashboards.
- Notification systems.
- Multiplayer applications.
Technologies such as WebSockets allow servers and clients to exchange data through persistent connections.
Libraries such as Socket.IO simplify real-time communication.
27.3 Streaming Applications
Node.js streams make it useful for applications that process data incrementally.
Examples include:
- Media streaming.
- Large file uploads.
- File downloads.
- Data transformation.
- Log processing.
27.4 Command-Line Tools
Node.js can also be used to create command-line applications.
Developers use it to build tools that automate tasks such as:
- Project scaffolding.
- File generation.
- Code formatting.
- Deployment automation.
- Development workflows.
Many tools in the JavaScript ecosystem are built with Node.js.
27.5 Microservices
Node.js can be used to develop independent services that communicate with one another.
For example, an e-commerce platform might contain:
E-COMMERCE PLATFORM
        |
        +-- Authentication Service
        |
        +-- Product Service
        |
        +-- Order Service
        |
        +-- Payment Service
        |
        +-- Notification Service
Each service can be developed and deployed independently, depending on the architecture.
Node.js is not required for microservices, but its ecosystem makes it a practical option for many service-oriented applications.
27.6 Automation and Development Tools
Node.js is also used outside traditional backend applications.
It can power scripts that:
- Rename files.
- Process data.
- Generate documentation.
- Automate testing.
- Manage project dependencies.
- Interact with APIs.
Its availability across major operating systems makes it useful for development automation.
28. Advantages and Limitations of Node.js
Like every technology, Node.js has strengths and limitations.
Understanding both sides helps developers decide whether it is suitable for a particular project.
28.1 Advantages
1. JavaScript Across the Stack
One of Node.js's biggest advantages is that developers can use JavaScript on both the frontend and backend.
For example, a development team building a mobile application with React Native can use Node.js to build the backend API.
This can reduce the need to maintain separate programming-language ecosystems.
2. Non-Blocking I/O
Node.js uses asynchronous, non-blocking I/O patterns that allow applications to handle multiple concurrent operations efficiently.
This is particularly useful for network-heavy applications.
3. Large Package Ecosystem
The npm ecosystem provides access to thousands of packages that developers can reuse.
This reduces the need to implement common functionality from scratch.
4. Cross-Platform Support
Node.js runs on major operating systems, including Windows, macOS, and Linux.
Developers can build applications across different environments.
5. Active Community
Node.js has a large developer community, extensive learning resources, and an established open-source ecosystem.
6. Suitable for Real-Time Applications
Its event-driven architecture makes Node.js a practical choice for applications that handle frequent communication between clients and servers.
28.2 Limitations
1. CPU-Intensive Operations
Long-running CPU-intensive JavaScript operations can block the main event loop.
Applications that perform extensive calculations may need worker threads, separate processes, or specialized computing services.
2. Asynchronous Complexity
Asynchronous programming can introduce challenges involving execution order, error handling, concurrency, and race conditions.
Developers need to understand how Promises, the event loop, and asynchronous APIs work.
3. Dependency Management
Node.js applications often rely on third-party packages.
Too many dependencies can increase maintenance requirements and introduce security risks.
4. Not Ideal for Every Workload
Node.js is particularly effective for I/O-intensive applications, but it is not automatically the best choice for every computational workload.
Applications involving intensive numerical processing or specialized scientific computing may benefit from other technologies.
5. Runtime and Memory Management
Poorly designed applications can experience memory leaks, excessive memory consumption, or performance degradation.
Developers need to monitor application behavior and manage resources carefully.
28.3 When Should You Use Node.js?
Node.js is a strong option when building:
- REST APIs.
- Backend services for mobile applications.
- Real-time applications.
- WebSocket-based systems.
- Microservices.
- Developer tools.
- Network-intensive applications.
- Applications involving asynchronous data processing.
It may require additional architectural support when building systems dominated by CPU-intensive workloads.
The decision should be based on the application's requirements rather than popularity alone.
29. Node.js Development Best Practices
Writing Node.js code that works is one thing. Writing code that can be maintained, tested, secured, and extended is another.
The following practices help developers build more reliable applications.
29.1 Use a Clear Project Structure
Avoid putting every route, controller, database query, and utility function inside a single file.
Organize code according to responsibility.
For example:
my-node-app/
│
├── src/
│   │
│   ├── config/
│   │   └── database.js
│   │
│   ├── controllers/
│   │   └── userController.js
│   │
│   ├── routes/
│   │   └── userRoutes.js
│   │
│   ├── services/
│   │   └── userService.js
│   │
│   ├── middleware/
│   │   └── authMiddleware.js
│   │
│   ├── utils/
│   │   └── response.js
│   │
│   └── app.js
│
├── tests/
│
├── .env.example
├── .gitignore
├── package.json
├── package-lock.json
└── server.js
This is one possible structure, not a mandatory Node.js convention.
The right organization depends on application size and architectural requirements.
29.2 Separate Application Logic from HTTP Handling
Controllers should generally handle HTTP-related responsibilities, while services contain reusable application logic.
For example:
// services/userService.js

async function getUserById(userId) {
  // Retrieve user from database
  return {
    id: userId,
    name: "Alex"
  };
}

module.exports = {
  getUserById
};
Controller:
// controllers/userController.js

const userService = require("../services/userService");

async function getUser(req, res, next) {
  try {
    const user = await userService.getUserById(
      req.params.id
    );

    if (!user) {
      return res.status(404).json({
        message: "User not found"
      });
    }

    res.status(200).json(user);
  } catch (error) {
    next(error);
  }
}

module.exports = {
  getUser
};
This separation makes the application easier to test and maintain.
29.3 Use Consistent Naming Conventions
Choose meaningful names for variables, functions, files, and classes.
For example:
// Unclear
const x = getData();

// Clearer
const userProfile = getUserProfile();
Good naming reduces the amount of explanation developers need when reading unfamiliar code.
29.4 Validate All External Input
Never assume that information received from a client is safe or correctly formatted.
Validate request bodies, route parameters, query parameters, uploaded files, and other external input.
29.5 Handle Errors Consistently
Avoid swallowing errors or returning misleading success responses.
Use centralized error handling where appropriate and ensure that unexpected failures are logged securely.
29.6 Use Environment Variables
Keep environment-specific configuration outside application source code.
Never hardcode production passwords, API keys, or database credentials.
29.7 Write Automated Tests
Test critical application behavior before deployment.
A practical testing strategy should include unit tests, integration tests, and API tests.
29.8 Keep Dependencies Under Control
Install packages intentionally.
Review dependencies, remove unused packages, and keep the lockfile under version control.
29.9 Use Logging
Logging helps developers understand what happens inside an application.
For production applications, use structured logging rather than relying entirely on scattered console.log() statements.
Popular logging libraries include:
- Pino.
- Winston.
Logs should not expose passwords, access tokens, or other sensitive information.
29.10 Use Version Control
Git helps developers track changes, collaborate with other developers, and maintain a history of the application.
A professional Node.js project should include:
- A meaningful README.
- A
.gitignorefile. - A package manifest.
- A lockfile.
- Clear commit messages.
- Appropriate documentation.
30. Practical Project: Building a Simple REST API
Theory becomes easier to understand when applied to a working project.
In this section, we will build a small REST API using Node.js and Express.
The API will manage a collection of users.
It will support:
- Retrieving all users.
- Retrieving a single user.
- Creating a user.
- Updating a user.
- Deleting a user.
This project uses an in-memory array to store data.
It is intended for learning purposes. Data will be lost when the server restarts. A production application should use a persistent database.
30.1 Project Prerequisites
Before starting, make sure you have:
- Node.js installed.
- npm installed.
- A code editor.
- Basic JavaScript knowledge.
- A terminal or command-line interface.
Verify your installation:
node --version
npm --version
30.2 Create the Project
Create a directory:
mkdir node-users-api
Navigate into it:
cd node-users-api
Initialize npm:
npm init -y
Install Express:
npm install express
30.3 Create the Project Structure
Organize the application:
node-users-api/
│
├── src/
│   ├── controllers/
│   │   └── userController.js
│   │
│   ├── routes/
│   │   └── userRoutes.js
│   │
│   └── app.js
│
├── server.js
├── package.json
└── .gitignore
This structure separates application setup, routing, and request-handling logic.
30.4 Create the User Controller
Create:
src/controllers/userController.js
let users = [
  {
    id: 1,
    name: "Alex",
    email: "alex@example.com"
  },
  {
    id: 2,
    name: "Jordan",
    email: "jordan@example.com"
  }
];

// Retrieve all users
function getUsers(req, res) {
  res.status(200).json({
    success: true,
    data: users
  });
}

// Retrieve one user
function getUserById(req, res) {
  const userId = Number(req.params.id);

  const user = users.find((user) => user.id === userId);

  if (!user) {
    return res.status(404).json({
      success: false,
      message: "User not found"
    });
  }

  res.status(200).json({
    success: true,
    data: user
  });
}

// Create a user
function createUser(req, res) {
  const { name, email } = req.body;

  if (
    typeof name !== "string" ||
    !name.trim() ||
    typeof email !== "string" ||
    !email.trim()
  ) {
    return res.status(400).json({
      success: false,
      message: "Valid name and email are required"
    });
  }

  const emailExists = users.some(
    (user) => user.email.toLowerCase() === email.trim().toLowerCase()
  );

  if (emailExists) {
    return res.status(409).json({
      success: false,
      message: "Email already exists"
    });
  }

  const newUser = {
    id: users.length
      ? Math.max(...users.map((user) => user.id)) + 1
      : 1,
    name: name.trim(),
    email: email.trim()
  };

  users.push(newUser);

  res.status(201).json({
    success: true,
    message: "User created successfully",
    data: newUser
  });
}

// Update a user
function updateUser(req, res) {
  const userId = Number(req.params.id);

  const user = users.find((user) => user.id === userId);

  if (!user) {
    return res.status(404).json({
      success: false,
      message: "User not found"
    });
  }

  const { name, email } = req.body;

  if (name !== undefined) {
    if (typeof name !== "string" || !name.trim()) {
      return res.status(400).json({
        success: false,
        message: "Name must be a non-empty string"
      });
    }

    user.name = name.trim();
  }

  if (email !== undefined) {
    if (typeof email !== "string" || !email.trim()) {
      return res.status(400).json({
        success: false,
        message: "Email must be a non-empty string"
      });
    }

    const emailExists = users.some(
      (item) =>
        item.id !== userId &&
        item.email.toLowerCase() === email.trim().toLowerCase()
    );

    if (emailExists) {
      return res.status(409).json({
        success: false,
        message: "Email already exists"
      });
    }

    user.email = email.trim();
  }

  res.status(200).json({
    success: true,
    message: "User updated successfully",
    data: user
  });
}

// Delete a user
function deleteUser(req, res) {
  const userId = Number(req.params.id);

  const userExists = users.some((user) => user.id === userId);

  if (!userExists) {
    return res.status(404).json({
      success: false,
      message: "User not found"
    });
  }

  users = users.filter((user) => user.id !== userId);

  res.status(200).json({
    success: true,
    message: "User deleted successfully"
  });
}

module.exports = {
  getUsers,
  getUserById,
  createUser,
  updateUser,
  deleteUser
};
30.5 Create the User Routes
Create:
src/routes/userRoutes.js
const express = require("express");

const router = express.Router();

const userController = require("../controllers/userController");

router.get("/", userController.getUsers);

router.get("/:id", userController.getUserById);

router.post("/", userController.createUser);

router.patch("/:id", userController.updateUser);

router.delete("/:id", userController.deleteUser);

module.exports = router;
The router defines the available HTTP endpoints and connects each endpoint to its corresponding controller function.
30.6 Configure the Application
Create:
src/app.js
const express = require("express");

const userRoutes = require("./routes/userRoutes");

const app = express();

app.use(express.json());

app.use("/api/users", userRoutes);

app.get("/", (req, res) => {
  res.status(200).json({
    message: "Welcome to the Node.js Users API"
  });
});

module.exports = app;
The application:
- Creates an Express instance.
- Registers JSON body-parsing middleware.
- Mounts the user routes.
- Defines a homepage endpoint.
30.7 Start the Server
Create:
server.js
const app = require("./src/app");

const PORT = process.env.PORT || 3000;

const server = app.listen(PORT, () => {
  console.log(`Server running on port ${PORT}`);
});

module.exports = server;
Run:
node server.js
The application should now be available at:
http://localhost:3000
30.8 Test the API Endpoints
You can test the API using Postman, Insomnia, or an HTTP client.
| Method | Endpoint | Purpose |
|---|---|---|
| GET | /api/users |
Retrieve all users |
| GET | /api/users/1 |
Retrieve a specific user |
| POST | /api/users |
Create a user |
| PATCH | /api/users/1 |
Update a user |
| DELETE | /api/users/1 |
Delete a user |
Example: Create a User
Request:
POST /api/users
Content-Type: application/json
Body:
{
  "name": "Taylor",
  "email": "taylor@example.com"
}
Expected response:
{
  "success": true,
  "message": "User created successfully",
  "data": {
    "id": 3,
    "name": "Taylor",
    "email": "taylor@example.com"
  }
}
Example: Retrieve All Users
Request:
GET /api/users
Expected response:
{
  "success": true,
  "data": [
    {
      "id": 1,
      "name": "Alex",
      "email": "alex@example.com"
    },
    {
      "id": 2,
      "name": "Jordan",
      "email": "jordan@example.com"
    }
  ]
}
The actual response will also include any users created during the current server session.
30.9 What This Project Demonstrates
By completing this exercise, you have worked with several fundamental Node.js and backend development concepts:
| Concept | Where It Was Used |
|---|---|
| Node.js | Runtime environment |
| Express | HTTP application framework |
| Modules | Separating application files |
| Middleware | Parsing JSON request bodies |
| Controllers | Handling request logic |
| Routing | Defining API endpoints |
| HTTP methods | GET, POST, PATCH, DELETE |
| Status codes | Communicating request outcomes |
| JSON | Request and response data |
Suggested Improvements
The example is deliberately small. To make it closer to a production application, consider:
- Connecting a PostgreSQL or MongoDB database.
- Adding request validation with a schema-validation library.
- Implementing authentication and authorization.
- Adding centralized error-handling middleware.
- Writing unit and integration tests.
- Adding environment-based configuration.
- Implementing structured logging.
- Documenting the API with OpenAPI.
- Adding rate limiting.
- Deploying the API to a hosting platform.
These improvements provide opportunities to apply the concepts discussed throughout this guide.
31. Common Node.js Mistakes
Developers learning Node.js often encounter similar problems.
Some of these mistakes come from misunderstanding how the runtime works, while others result from applying frontend JavaScript patterns directly to backend development.
Here are some issues worth paying attention to.
31.1 Blocking the Event Loop
Using synchronous file-system operations inside request handlers can prevent the main JavaScript thread from processing other callbacks.
Better approach: Use asynchronous APIs for I/O operations in server-side request handling.
31.2 Forgetting to Handle Promise Rejections
Consider:
async function getData() {
  throw new Error("Something went wrong");
}

getData();
The function returns a rejected Promise.
If the rejection is not handled, it may result in an unhandled rejection.
A better approach is:
getData().catch((error) => {
  console.error(error.message);
});
Or use try...catch inside an appropriate async function.
31.3 Assuming Every Asynchronous Operation Uses the Thread Pool
Not every asynchronous Node.js operation is handled by Libuv's worker thread pool.
Network I/O and file-system operations may use different underlying mechanisms.
Understanding this distinction helps developers reason more accurately about runtime performance.
31.4 Mixing Module Systems Carelessly
Using require() and import without understanding how the project is configured can lead to module-loading errors.
Better approach: Choose a module system and configure it consistently.
31.5 Exposing Sensitive Information
Committing .env files, database credentials, or API keys to public repositories can create serious security problems.
Better approach: Use environment variables, .gitignore, and secure secret-management systems.
31.6 Putting Everything in One File
Large applications become difficult to maintain when all routes, business logic, and database operations are placed together.
Better approach: Separate responsibilities into modules, services, controllers, and routes where appropriate.
31.7 Treating Node.js as a Framework
Node.js provides the runtime. Frameworks such as Express and NestJS provide additional application-development structures.
Understanding this difference helps developers choose the right tools.
31.8 Ignoring Dependency Updates
Outdated packages can introduce compatibility and security issues.
Better approach: Review dependencies regularly, check security advisories, and test updates before deploying them.
32. Frequently Asked Questions
1. What is Node.js used for?
Node.js is used to build backend applications, REST APIs, real-time systems, command-line tools, automation scripts, and other JavaScript-based applications that run outside a browser.
2. Is Node.js frontend or backend?
Node.js is primarily associated with backend and server-side development.
However, it is also widely used for frontend development tools, build systems, testing tools, and command-line utilities.
3. Is Node.js the same as JavaScript?
No.
JavaScript is a programming language, while Node.js is a runtime environment that allows JavaScript to execute outside a browser.
4. Is Node.js single-threaded?
JavaScript application code generally runs on a main JavaScript thread.
However, the runtime also uses other mechanisms, including operating-system facilities, a worker thread pool, and optional worker threads, to handle certain operations.
Therefore, describing Node.js as entirely single-threaded is misleading.
5. What is the difference between Node.js and Express?
Node.js is the runtime environment.
Express is a web framework that runs on Node.js and simplifies HTTP server and API development.
6. What is npm in Node.js?
npm is the default package manager distributed with Node.js.
It allows developers to install, manage, update, and share JavaScript packages.
7. Can Node.js connect to a database?
Yes.
Node.js can communicate with databases through database drivers, clients, and Object-Relational Mapping (ORM) tools.
Common database options include:
- PostgreSQL.
- MySQL.
- MongoDB.
- SQLite.
- Microsoft SQL Server.
8. Can Node.js be used to build mobile app backends?
Yes.
Node.js is commonly used to build APIs that power mobile applications developed with React Native, Flutter, native Android, and native iOS.
9. What is the event loop in Node.js?
The event loop is a mechanism that coordinates asynchronous operations and executes callbacks when they become eligible to run.
It allows Node.js to handle many I/O operations without blocking the main JavaScript thread while waiting for each operation to complete.
10. What is the difference between callbacks and Promises?
A callback is a function passed to another function for execution later.
A Promise represents the eventual completion or failure of an asynchronous operation.
Promises provide methods such as .then() and .catch() for managing asynchronous results.
11. What is async/await?
Async/await is JavaScript syntax for working with Promises.
It allows developers to write asynchronous code in a sequential-looking style without blocking the entire runtime.
12. Can Node.js be used for large applications?
Yes.
Node.js can power large applications when supported by appropriate architecture, database design, security practices, testing, monitoring, and deployment infrastructure.
13. What is the difference between CommonJS and ES Modules?
CommonJS uses require() and module.exports, while ES Modules use import and export.
Both systems are supported by Node.js.
14. Is Node.js suitable for real-time applications?
Yes.
Node.js is commonly used for chat systems, live notifications, collaborative applications, and other systems requiring frequent communication between clients and servers.
15. Do I need to learn Express before learning Node.js?
No.
It is better to understand the fundamentals of Node.js first, including modules, asynchronous programming, the event loop, and core APIs.
Once those concepts are clear, learning Express becomes easier.
16. What is the difference between Node.js and Deno?
Both are JavaScript and TypeScript runtime environments, but they have different designs, APIs, tooling, and ecosystem approaches.
Node.js has a long-established npm ecosystem and extensive production adoption, while Deno offers a different developer experience with built-in tooling and web-standard APIs.
17. Does Node.js support TypeScript?
Yes, but the execution approach depends on the Node.js version and project configuration.
Developers can use TypeScript through compilation, third-party runtime tools, or supported native TypeScript execution features in modern Node.js releases.
Type checking and full TypeScript compilation remain separate concerns.
18. What should I learn after Node.js?
A practical learning progression is:
- JavaScript fundamentals.
- Node.js core concepts.
- Express or Fastify.
- REST API development.
- Database integration.
- Authentication and authorization.
- Testing.
- Security.
- Deployment.
- Application architecture and scalability.
33. Conclusion
Node.js has made JavaScript useful far beyond the browser.
What began as a way to execute JavaScript on the server has developed into a runtime environment used for APIs, real-time systems, development tools, automation, and a wide range of backend applications.
However, understanding Node.js involves more than learning how to install Express or create a server.
The real foundation lies in understanding how the runtime operates.
V8 executes JavaScript. Libuv provides important asynchronous infrastructure. The event loop coordinates callbacks and asynchronous operations. Core modules expose functionality for working with files, networks, operating-system resources, and other parts of the runtime.
These components work together to make Node.js suitable for many I/O-intensive applications.
As a developer, you do not need to understand every internal implementation detail before building useful applications. However, understanding the fundamentals will help you make better architectural decisions, troubleshoot problems, and write more efficient code.
If you are just starting with backend development, take the concepts in this guide one step at a time.
Start with the runtime, learn how modules work, become comfortable with asynchronous JavaScript, build a simple HTTP server, and gradually move toward APIs, databases, authentication, testing, and deployment.
The goal is not simply to learn how to use Node.js. It is to understand how to use it responsibly to build applications that other people can depend on.
34. Further Learning Resources
The following resources provide additional information about Node.js, JavaScript, backend development, and related technologies.
| Resource | Description |
|---|---|
| Node.js Official Documentation | Official documentation for Node.js APIs and runtime features |
| Node.js Learn | Learning materials covering Node.js fundamentals |
| Node.js GitHub Repository | Source code, development activity, and project information |
| MDN JavaScript Guide | JavaScript language fundamentals |
| MDN HTTP Guide | HTTP concepts, methods, headers, and status codes |
| Express Documentation | Documentation for the Express framework |
| Fastify Documentation | Documentation for Fastify |
| NestJS Documentation | Documentation for NestJS |
| npm Documentation | Package management and npm commands |
| V8 Documentation | Information about the V8 JavaScript engine |
For the most accurate information about runtime behavior, API availability, and version-specific features, always consult the official Node.js documentation.
Document Review and Maintenance
| Item | Description |
|---|---|
| Document status | Initial publication |
| Review frequency | Periodically, and when significant Node.js changes affect the content |
| Primary reference | Official Node.js documentation |
| Intended audience | Beginner and junior developers |
| Maintenance responsibility | Documentation author or maintainer |
Documentation Maintenance Notes
Node.js is an actively maintained runtime. Its APIs, release schedules, security recommendations, and supported features may change over time.
When updating this article:
- Review examples against the current Node.js documentation.
- Verify version-specific features.
- Check package installation commands.
- Update framework recommendations when necessary.
- Review security guidance against current best practices.
- Test practical code examples before publication.
- Update the review date after substantive revisions.
End of Document.
Author's note: This article is intended to serve as a learning resource for developers building a foundation in Node.js and backend development. The examples are educational and should be adapted, tested, and reviewed before being used in production applications.
About the author
- I'm a frontend and mobile developer, technical writer, and SEO specialist passionate about making technology easier to understand. I write practical, beginner-friendly articles on JavaScript, React, React Native, web development, APIs, and developer tools. My goal is to turn complex technical concepts into clear explanations, useful tutorials, and well-structured documentation that developers can apply in real projects. Through my writing, I aim to help developers learn, solve problems, and build better digital experiences.
Comments
Join the discussionNo comments yet. Be the first to comment.